
Force of Habit: Day 3 / RepRap build & RPi Camera Faff
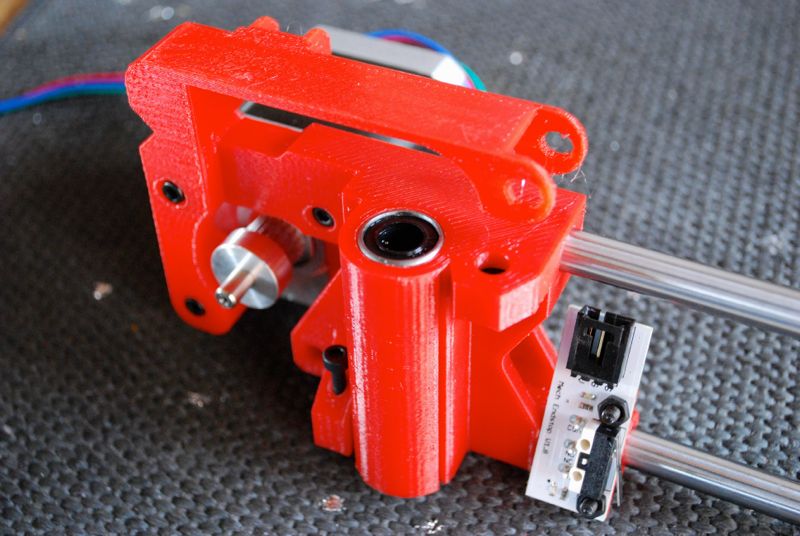
After a championship faffing and distraction session this morning, I finally got down to some RepRap building in the afternoon. I had just enough time to put together the X-Axis assembly and pull together a short video:
The assembly of the printer continues to be a pretty straightforward instruction-following exercise, albeit with the occasional tweak to the 3D printed parts. The printer is a combination of off-the-shelf hardware and custom, open source 3D printed parts. Inset nuts need welding into place with a soldering iron, and as you’ll see in the video today, I’ve resorted to using a Dremel (OK a Black and Decker rotary tool) to grind out some tight bearing surfaces and to clear support material from bolt holes.
What a tool!
In making these little tweaks to the parts, I’m starting to get a glimpse of the craftsmanship of working with FDM parts. The resolution of the printed objects is good, but tolerances are unpredictable enough to require the occasional intervention. With the soldering-iron welding technique or a bit of filing/Dremeling you start to get greater precision and more of a sense of the material’s potential.
Building my RepRap printer is a kind of apprenticeship. I’m forced into understanding not only the mechanics of creation, but also the fundamental properties of the medium. How soft. How forgiving. What errors amplify or dampen. This slow, deliberate learning is inaccessible to anyone who buys a ready-to-print machine. By starting with a printer build, I earn a feel for the objects and techniques.
Every master knows that the material teaches the artist. Ilya Ehrenburg
The model of printer that I’m building, a RepRap Prusa i3-Hephestos uses lots of lovely little hex nuts for assembly. While I’m getting on fine with traditional Allen keys, it’ll be time soon to pick up some screwdriver-style hex drivers. It’s one thing to hack together a piece of IKEA furniture, its another thing to work with hex nuts day in and day out. See if you can spot me dropping my tools in the video repeatedly.
What’s with the wide face?
In putting together today’s GoPro timelapse, I haven’t exactly picked the most flattering angle. A fish-eye lens may be great for wide-angle action shots of hucking off gnarly kickers in the Grands Montets (bro), but it’s pretty lousy for close up tech builds.
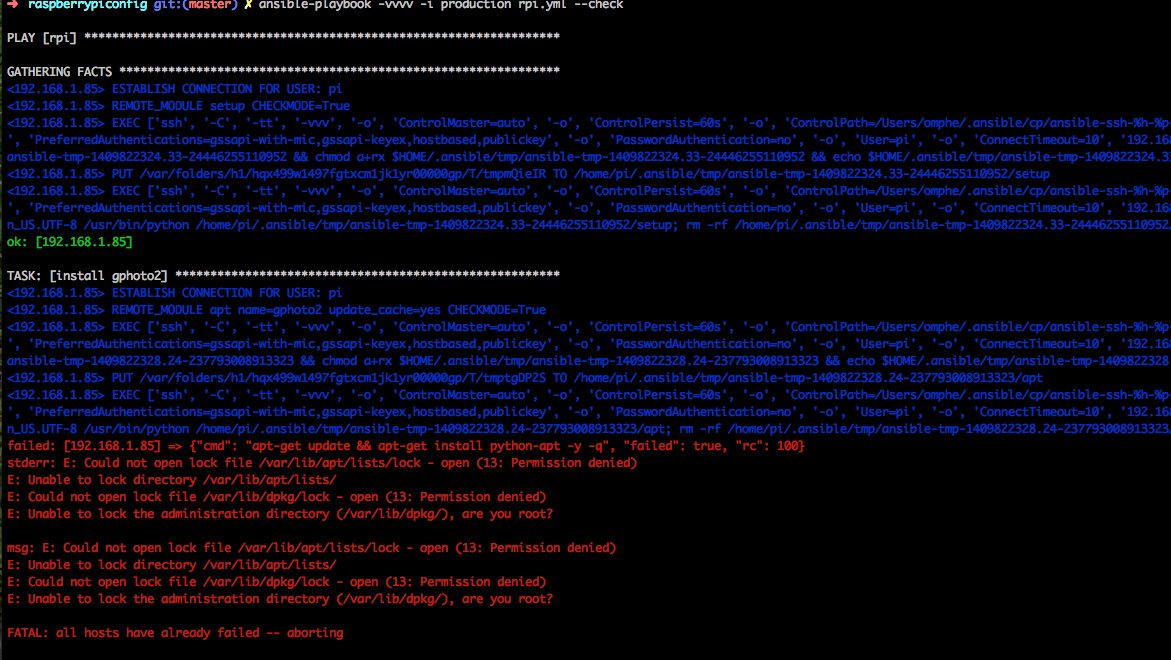
I’ve been recently looking into driving my Nikon D60 DSLR with a computer for creating timelapses. I spent some time getting started with a RaspberryPi this morning, using Ansible to configure the device and to set up gphoto2 for camera control.
I was making good progress, until I ran into a UDEV issue when tethering the camera via USB. It was the perfect example of getting derailed on a project while trying to do some supporting activity. Totally worthwhile, but a few hours sidetrack nonetheless. I’ll post a further write up when I’ve sorted it and have some videos ready.